Monday, 3 June 2013

Warhammer Quest on the iPad

It seems there is a growing interest in reviving many of the old Games Workshop boardgames and almost forgotten games on modern devices. The latest I have come across is this excellent conversion of Warhammer Quest into an iPad game. I am not an expert on Warhammer Quest by any means, having only played it a couple of times many many years ago, but this looks to be a faithful reproduction of the game.


You get to quest through various cities in the Empire, discovering new destinations and dungeons as you complete quests and slay the bad guys.


You start out with the traditional 4 characters, the barbarian, the elf, the dwarf and the wizard and there is an option to buy 3 different characters if you wish at $3 each (I think). The game itself cost $5 to download so the new characters do seem a little expensive, but fortunately they are not a requirement to play the game. Game play is turn by turn as per the board game with all the rules in place. You don't get to see the dice rolls which seems to upset some people but it really doesn't bother me, actually I prefer the game without an artificial dice roll occurring.


After crawling through various dungeons and emerging battered but victorious you can return to one of the settlements nearby to level up your heroes and buy new equipment and provisions. There are several difficulties you can play on which allow you to recover dead heroes or play on the hardest mode where a dead hero is dead for good - you can still recruit a new rookie hero from a settlement and hope they survive a little longer. 


I believe there are several other GW games that are being ported to the iPad, Space Hulk being one of them. There are so many GW turn based games that are simply crying out to be converted into the digital realm that I see a bumper crop of toys ahead of Oldhammer gamers. 

Tuesday, 12 March 2013

These are the pros and cons of dipping

A little tip of the hat to Roger Waters in the title of this blog ;)

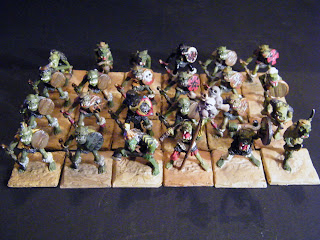
I have decided on a project of dipping all the goblins for my Orc army. The models I have are mostly current edition goblins and I have to say I really enjoy them. They retain a lot of character and are scaled correctly to older editions of Warhammer Goblins which is very handy. So mixing and matching Goblins from various periods shouldn't pose much of a problem.

I have elected to turn these guys into something of a semi-speed painting exercise using the Army Painter dip that is proving popular amongst many gamers these days. I am certainly no expert in using this stuff, but what I have learned is that you need to paint lighter than expected as the dip will darken all your colours and I have also discovered that the dip is very forgiving of sloppy paintwork as it does a great job of hiding small errors and tying the paint job together. Take these Night Goblin fanatics for example, I sprayed them a grey/khaki colour as this is the colour I want all their clothing to be, then painted the skin, some brown areas and metal. No more than a few minutes spent on each. Very simple painting, nothing detailed and in truth rather heavy handed.

Then I dipped them and left them to dry overnight. The dip does an excellent job of shading the models and bringing them to a standard that I think is game ready. They are nothing spectacular by any means but an entire army painted like this will look very unified and comfortably to a tabletop standard.

I am unable to leave them like this as I have to add some highlights and details, but I am very comfortable playing with them in this state till I get round to doing that. With some flocking on the bases they will be welcome in my army any day. Here are the squigs that I have gone and dipped in the same manner.

Again nothing fancy but good enough to play with. They do all need a coast of matt varnish to get rid of the gloss look though! And finally here is a unit of squigs that have had a little more attention paid to them. Not much more than some simple dry-brushing and basing with a few details picked out. I am very happy with the results from a very simple painting process. More painted miniatures on the table is always a winner in my book! :)

There is a lot I can do to turn them into well painted miniatures but that really isn't the point of this project. So what are the cons of dipping? Well I would say that you are not going to get top quality paint jobs out of dipping so don't use it if you are looking for a Golden Demon winning army or anything that is going to grace the pages of White Dwarf or CMON. But for the time and effort involved I can highly recommend this for certain armies. Anything dark and dirty is well suited to dipping, undead are ideal candidates. High Elves, for example, are not going to suit dipping much though, there a cleaner, crisper paint job is required that dipping isn't going to provide. I do stand to be corrected on this point though as I do think it would be possible to get some good effects with High Elves, but the point in general stands I think :D

Saturday, 9 March 2013

Still alive and spawning Orcs

I haven't had a chance to post anything on her in a while now. Nor have I had much opportunity to get much gaming or painting in the last month or two. But I have done a little and while I haven't been making much headway on getting miniatures painted I have added a fair number of new troops to the growing Orc horde. They are not all GW miniatures but they all do fit into the Oldhammer feel. There are even a few modern GW squigs running around - they are great miniatures and I love the comedy and chaos they bring to a game. - used only when playing a modern game of Warhammer though, unless there is a 3rd edition equivalent I could substitute them for?

Anyhow, by way of inspiring myself I took a few pics of the entire Orc collection so far. I think I have enough now to keep me happy for a long time, so now I can look at adding a few of the more exotic elements to the army. I definitely need more warmachines!


So much painting still to do! As soon as I finish another unit I will take much nicer photos and put some more pictures up.

Monday, 28 January 2013

Identifying old lead

So a good friend was kind enough to give me a huge load of old miniatures over the weekend, stuff he no longer used in his own vast collection or was simply too old to find a place any more. 
The problem is I can only identify around a third of the models so I am asking for your help in identifying the rest. Some I know are Citadel and can identify easily enough. Some are Grenadier, some may be Citadel but I am not sure, others I have no idea what so ever! This is going to be a pic heavy post, but I have optimised the images so they are all relatively small (in kb) and will load quickly. 

So lets get on with it then.

1: First up is what I assume is an early Citadel chaos mutation


2: Some sort of bugbear/beastman? Appears to be Citadel from the base.


3 :Lizardman type no idea on the make.


4: I am pretty sure this is an early Citadel beastman.


5: Appears to be an Orc, company unknown.


6: Citadel I think? Maybe an early beastman as well.


7: Orcs from an unknown company (plastics)


8: A lizardman type from unknown company


9: Beastman/Lizard from unknown company


10: Orc from unknown company - could be an Ogre as it is on a large base


11: Citadel Orc from early 80 or so I beleive


12: Orc from unknown company - could be an Ogre as it is on a large base


13: Orc from unknown company - could be an Ogre as it is on a large base


14: Orc from unknown company - could be an Ogre as it is on a large base


15: I suspect these are Grenadier Hobgoblins


16: Grenadier Orc I believe 


17: Pre-slotta Citadel Orcs. I recognise a few that were continued into the late 80s with slotta bases


18: Citadel Orcs from the mid 80's


19: Orcs from an unknown company. Look a bit like they are meant to be Black Orc types


20: unidentified Grenadier miniature


21: Citadel Orc dated 1984. A shaman of some sort?


22: Grenadier Orc riding a dinosaur/wyvern/cold one?


So that's the lot of them. I eagerly look forward to working out what a lot of these guys are, that's half the fun of this Oldhammer gig after all :) Please let me know which miniatures you are able to identify.

Wednesday, 23 January 2013

A small gathering of Orcs

My small horde of Orcs is taking it's time growing but it is growing little by little. More importantly I am making some (slow) progress at getting them painted. The command models to complement the plastic Orc boyz have now been painted and fit into the unit perfectly.


Some close ups to reveal all my flawed painting...


Now a group shot of the assembled horde. Led by the as yet unnamed lvl 20 Black Orc hero riding the Wyvern, a Skull Krusha keeps the troops amused, while a lonely Troll waits in the background (his friend seems lost in the post). 3 Orc archers on wolves trot down the road, followed by a lvl 10 Orc hero with crossbow riding a boar. 2 units of 10 arrer boys soften up the enemy before the unit of 19 boyz, a unit of 14 biguns and 9 Black Orcs close in to get their blades wet.


All in all this lot amounts to a little over 1000 points which is a decent start. I will be adding more Orcs and some Goblins to the list as well as an allied contingent of Chaos - Kaleb Daark, 5 Chaos warriors and 2 Minotaurs so far.

Friday, 18 January 2013

Realm of Chaos - Slaves to Darkness


I just got my grubby little mitts on a copy of Slaves to Darkness. A lovely near mint copy to boot. Now to collect myself an nice little Khorne warband.

Sorry, not much of post is this? I promise to put up something more interesting next time.


EDIT - added some photos:

Some great colour photos of miniatures in the centre pages that I had never seen before (in PDF versions)


And just look at that lovely black and white artwork. Just gorgeous...


Wednesday, 9 January 2013

Getting on with it

Most of my time over the short holiday break was taken up with terrain building, many hours spent in the hardware store and model train shop. So I have gotten a decent start going on my modular terrain. 3 sections down at least - namely the easiest of the lot as I rather chickened out on the hills and river sections. Still I have 3 very nice road sections done and 4 excellent wall sections to go with it (thanks to some Hirst mould pieces).

Its a good enough start and I have one more road section to complete before I tackle the hills next. Then I will have a playable table of  the bare minimum 6 boards. I have a few more trees to make then I should have enough for three or 4 decent  sized forests. Next up after that is to construct a few loose hills before tackling the river sections and a couple more hill sections. I intend to have one long river section (basically a double length modular terrain board) and 2 curves.

So here is my very first attempt at a major terrain building project. Dreamfish was the major inspiration behind this project, as was Quindia Studios

After a bit of trial and error I settled on 20mm x 20mm wooden frames for each terrain piece. They were stuck down over MDF board and a piece of expanded polystyrene cut to and glued fit into the frame.


Next up was texturing the board. For this I watered down some wood glue about 75% glue and 25% water which I then squirted onto and brushed over the surface of the boards. I did this in roughly 10 to 15cm squares, then scattered my small stones (aquarium sand) over the board before painting on another square of glue and repeating the process. I left the area where the road was going to go clear of the sand. Once all the sand was glued down I textured the road surface with polyfilla, covering the entire surface of the road and scraping the road texture into the putty, leaving ruts and grooves where carts may have travelled. Nothing too exact but just enough to give it a nice surface. I left all of this to dry overnight and then sprayed a heavily watered down wood glue and water mix over the entire board to help seal the sand in place. 


Once all of this was dry I painter the entire board in a "burnt umber" (big pot of acrylic craft paint), then liberally dry brushed "sienna" over this followed by a lighter dry brush of "flesh". This gave the board a nice earthy feel over which I could then add the grass.


Yet more wood glue (I am using a hell of a lot of this stuff!) was painted onto the board surface, leaving patches of bare earth. I then sprinkled my cheap static grass over the glue, occasionally adding a more yellow static grass to break up the colour of the board. It tended to come out in a fairly clumpy finish which I like, giving the appearance of an actual field and not a smooth billiard table. 


Give this another few hours to dry then I turned the board upside down and tapped the back of the board to remove all the loose grass (all of which went back into the big tub of static grass to be sprinkled over the next board). Next up I worked on sticking together random pieces of  bricks from a Hirst cast to make some walls. Nothing much to these but I may describe how they are painted another time. 

I did go back to the boards once they were basically finished and glued a few more clumps of grass onto them to further break up the surface and add some more colour variation (yellow grass and the brighter green citadel grass)


And thats all I have for now. When I get a chance (and the 4th board is made)  I will take some better photos (all of these are with the cellphone) with some units on the boards.